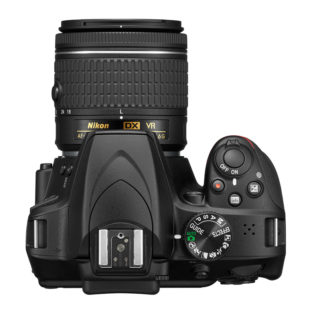
"First of all, I have to say I am not normally a "letter writer", but felt it necessary to put fingertips to keyboard to convey my thanks to you at your wonderful shop.
The legendary award-winning Grays of Westminster is a charming period shop, specialising exclusively in Nikon. It offers what is probably the widest range of new and second-hand Nikon in the world. It is situated in a quiet location in central London and offers a fast and reliable mail-order service on any Nikon item - available to all world-wide destinations. Tax free shopping to non-European Community residents is also available.
Choosing the ideal camera lens can be a daunting task, especially with the vast array of options available. Whether you’re a budding photographer or a seasoned pro, understanding the different types of lenses and their unique features is essential to capturing the images you envision. In this guide, we’ll break down the key factors to consider, helping you find the lens that best suits your style, needs, and budget.
Set Your Photography Objectives
The first step in choosing a camera lens is to identify your photography goals. Are you interested in landscape photography, which typically requires wide-angle lenses to capture expansive scenes? Or perhaps you’re drawn to portrait photography, where a prime lens with a wide aperture can create beautiful bokeh effects. Understanding your primary photography style will narrow down your options and make it easier to find a lens that complements your creative vision.
Focal Length
Another crucial factor to consider is the focal length of the lens, which determines how much of the scene will be captured and how close you can get to your subject. Lenses with shorter focal lengths, such as Z 20mm f/1.8 S,Z 24mm f/1.8 S or the newZ 35mm f/1.4, are great for wide-angle shots and landscapes, while lenses with longer focal lengths, likeZ 85mm f/1.2 S or the Z 135mm Plena, are ideal for portrait photography. Additionally, zoom lenses offer versatility by covering a range of focal lengths, making them perfect for those who want flexibility in various shooting scenarios. Some honourable mentions include the versatileZ 14-24mm f/2.8 S for breath taking wide-angle shots, the new Z 28-400mm f/4-8 VR for unparalleled zoom capabilities, and the Z 100-400mm f/4.5-5.6 S VRfor exceptional telephoto performance.
Aperture
Aperture is another important aspect to consider when selecting a lens. The aperture size, indicated by the f-number (such as f/1.8 or f/4), affects the amount of light that enters the lens and the depth of field in your photos. Lenses with wider apertures (lower f-numbers) allow more light to enter, making them excellent for low-light conditions and achieving a shallow depth of field, which beautifully blurs the background. On the other hand, lenses with narrower apertures (higher f-numbers) are better suited for scenarios where you want more of the scene to be in sharp focus, such as in landscape photography. Additionally, the aperture of the lens also affects the autofocus speed; the autofocus system needs light to work,therefore, it may struggle in low-light situations. Some notable Nikon lenses include the Z 58mm f/0.95 S Noct, Z 50mm f/1.2 S, Nikon TV-Nikkor 35mm f/0.9 (the fastest lens Nikon ever made), 50mm f/1.2 Nikkor AIS,and the105mm f/1.4E AF-S Nikkor ED.
Size and Weight
Size and weight are crucial considerations when selecting a camera lens because the best lens is ultimately the one you’ll want to carry with you. A lens that is too bulky or heavy can become a burden, discouraging you from taking it along on your photographic adventures. Compact and lightweight lenses, on the other hand, are more portable and convenient, making it easier to capture spontaneous moments and travel with ease. Balancing the lens’s performance capabilities with its size and weight ensures that you have a versatile and practical tool that you’ll be eager to use, no matter where your photography takes you.
Budget
Lastly, budget plays a significant role in your lens selection process. At Grays of Westminster, we understand that photography is not just a passion but also an investment. That’s why we offer a range of options to suit every budget, from brand new lenses with cutting-edge features to carefully curated second-hand equipment that delivers exceptional performance at a fraction of the cost. By considering your photography goals, prioritizing key features, and exploring both new and second-hand options, you can find the perfect camera lens that meets your needs without breaking the bank. At Grays of Westminster, we’re here to help you make informed decisions and embark on your photography journey with confidence.
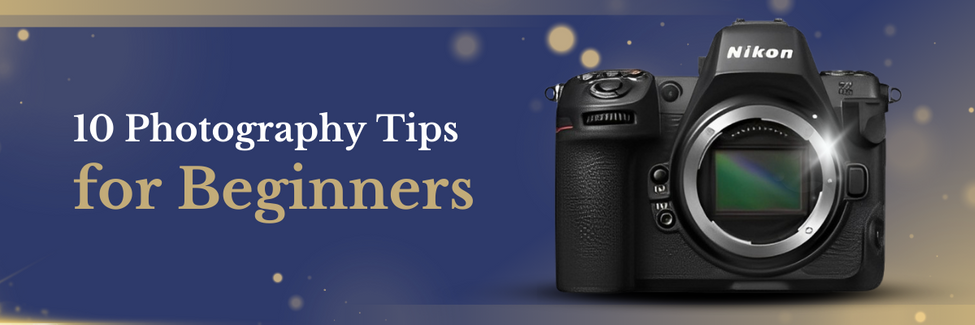
The world of photography offers limitless potential for creativity, self-expression and discovery. However, the various technical aspects of photography can be daunting to beginners who are looking for beginner-friendly, basic photography tips and tricks.
As a Nikon specialist camera shop, we are experts who can help you get set up as a beginner photographer and start capturing the world around you with confidence in no time. In this article, we will offer our top 10 tips for beginners, which include our recommendations for the best Nikon cameras for novice photographers and explain the four basic elements or settings of photography.
Tip 1: Choosing The Best Nikon Camera for Beginners
The first thing a beginner photographer should consider is choosing the best camera that offers the best functionality for novices. As a Nikon specialist, we are uniquely positioned to recommend the best Nikon cameras that are perfect for beginners:
Nikon Z30
Ideal for newcomers to the world of photography, the Nikon Z30 stands out as a versatile companion for capturing stunning images. With its ultra-wide Z mount and large DX-format 20.9 MP CMOS sensor, this camera excels in absorbing light, ensuring superior image quality when compared to smartphones. Whether it’s day or night, the Z30 delivers exceptional detail, making it a perfect choice for exploring various photography styles.
Moreover, the absence of an Electronic Viewfinder (EVF) in the Z30 contributes to its compact size while maintaining unparalleled brightness. This feature makes it an excellent option not only for photography but also for vlogging, especially with its ability to shoot in 4K video resolution.
Nikon Z50
Another beginner-friendly option is the Nikon Z50, a mirrorless camera designed for those who value the convenience of a built-in electronic viewfinder (EVF). Boasting a 20.9-megapixel sensor, impeccable autofocus, and an innovative tilting touchscreen, this entry-level DSLR alternative delivers unparalleled performance within its price range.
Embrace the world of photography with ease using this compact, lightweight camera, perfectly suited for on-the-go shooting. Its portability and user-friendly design make it a popular choice among beginners, allowing for a seamless transition into the world of photography.
Still undecided?
We’ve created a helpful video comparing both camera models in detail, shedding light on their differences. Click this link to watch the full video, and remember to subscribe for regular updates – our videos cover topics ranging from product reviews to photography tips and insights.
Tip 2: Understanding the 4 Basic Elements of Photography (Composition, Aperture, Shutter Speed, ISO)
While photography terminology can seem daunting and confusing, we’d like to make things simpler for aspiring photographers who are just embarking on their photography journey.
It is crucial to understand the four basic elements of photography, which correspond to the main settings on any camera: composition, aperture, shutter speed and ISO. Keep reading to find out what each of these terms means.
Composition
Composition is the placement or arrangement of visual elements in a photograph. There are two types of composition: static and dynamic.
A static composition typically depicts a scene of immobile subjects such as still life arrangements, individuals, or landscapes. Conversely, a dynamic composition captures the motion of its subjects, often showcasing moving objects or lively scenes.
Central to effective composition is the concept of the rule of thirds.
To understand this concept, imagine dividing an image into nine equal sections using two intersecting lines and placing key elements at the points where these lines intersect. Using the rule of thirds can help photographers create well-balanced and dynamic compositions.
Aperture
Aperture refers to the size of the opening in the lens and is measured in f-stops. Remember: the smaller the f-stop number, the larger the aperture, and vice versa. The aperture setting controls how much light enters the camera.
Aperture also plays a crucial role in determining the depth of field in your shot – in other words, how much of the image is in sharp focus. A larger aperture (i.e. a lower f-stop number, for example, f/1.8) results in a shallow depth of field, which makes the subject stand out against a more blurred background.
Shutter Speed
Shutter speed refers to the speed at which your shutter opens and closes. It’s measured in seconds. In a nutshell, the faster the shutter speed, the less time light has to enter the camera, resulting in a darker photograph.
ISO
ISO refers to the sensitivity of the image sensor to light and is measured in ISO units. A higher ISO number indicates a higher sensitivity and a greater capability to capture light, which results in a brighter photograph.
Tip 3: The Easiest Subjects to Capture for Beginners
For beginner photographers, starting with accessible subjects that are easy to capture can help build confidence and skills. Here are some of the easiest subjects to start out with:
Landscapes: Landscapes offer static subjects that allow beginners to experiment with framing, composition, and lighting at their own pace.
Still Life: Arrange everyday objects to create artistic compositions. Still-life objects are immobile, making them ideal subjects for novice photographers.
Pets: Pets can make excellent subjects for practice. They’re often familiar with the photographer, making it easier to capture their natural expressions and behaviours.
Flowers and Plants: Capture the beauty of the botanic world in gardens, parks, or even indoors. Flowers and plants are visually appealing subjects that allow beginners to practise focusing, depth of field, and composition.
Family and Friends: Portraiture allows beginners to focus on capturing expressions and emotions while also experimenting with lighting and composition.
Tip 4: Start with Your Immediate Surroundings
Are you eager to delve into the world of photography? Look no further than your own immediate surroundings for inspiration. While exotic destinations may be alluring, don’t overlook the beauty and potential of your own neighbourhood. By venturing into familiar streets, parks, and landmarks, you’ll train your eye to see the world with fresh perspective and creativity. So grab your camera, step outside, and unlock the hidden gems waiting to be captured through your lens right in your own backyard.
Tip 5: Experiment with Different Composition Techniques
Composition is one of the most crucial elements of photography. In addition to the “rule of thirds” explained above (see Tip 2), beginner photographers can also experiment with different techniques such as symmetry, framing and leading lines (lines that lead the viewer’s eye from one part of a composition to another). Experimenting with these techniques not only allows beginner photographers to improve their basic photography skills but also to discover new methods for storytelling, evoking emotions, and capturing the essence of their subjects.
Tip 6: Explore Lighting Options
Beginner photographers can explore different lighting options by experimenting with various sources of lighting and weather conditions.
Start by observing how natural light changes throughout the day, from the soft hues of dawn to the warm glow of the golden hour – that magical and fleeting period just after sunrise or before sunset. Experiment with shooting in different weather conditions, such as overcast skies or sunny days, to understand how light affects mood and atmosphere. Additionally, try using artificial lighting sources like lamps and flashlights to manipulate light and create different effects.
Tip 7: Get the Focus Right
Different focus techniques can create entirely different visual effects and evoke different moods and emotions. Even beginner photographers can experiment with different focus techniques to unlock a world of creative possibilities.
Firstly, beginners must grasp the concept of depth of field: simply put, depth of field is the distance between the closest and farthest objects in a photo that appears acceptably sharp. The shallower the depth of field, the more blurred objects in the background will appear, and vice versa.
As mentioned above, the aperture is one of the key determinants of the depth of field – a wider aperture (smaller f-stop number) creates a shallower depth of field, and it works the other way around. Novice photographers can experiment with focus by trying different aperture settings to control what is in focus and what is blurred.
Furthermore, don’t rely solely on autofocus. Practise adjusting focus manually to precisely control what you want to emphasise in your photograph, as this is where artistry comes into play. Try applying the selective focus technique to draw attention to your subject by keeping it sharp while blurring the background or foreground.
Tip 8: Try Different Points of View
In photography, ‘point of view’ refers to the position the camera is in when viewing a scene. In real life, we tend to look at things around us at eye level, but shooting from different points of view can help us see the world with a fresh perspective.
Try shooting from various angles: get low to the ground or shoot from above for a bird’s-eye view. Changing your point of view can dramatically alter the composition of your image, emphasising different elements and creating dynamic storytelling. Experiment with different heights, distances, and angles to discover how they affect the mood and narrative of your images.
Tip 9: Learn the Basics of Post-Processing
For beginner photographers, post-processing can seem daunting, but it’s an essential part of the creative process in the world of digital photography.
Start by familiarising yourself with basic editing tools in software like Adobe Lightroom or Photoshop. Focus on the basic features first: try adjusting the exposure, contrast, and colour balance to enhance your images while maintaining a natural look.
Crucially, don’t forget to save your original files before making any edits so you always have a backup to revert to if needed. With practice, you’ll become more confident in your post-processing abilities and elevate your photography to new heights.
Tip 10: Practice Makes Perfect
As with any skill, practice makes perfect, and it’s no different when it comes to photography. As a beginner photographer, one of the best ways to maximise opportunities for practice is to take your camera with you as often as you can and document everything around you with it. You can experiment with different objects, locations and landscapes as you go about your everyday life while honing your photography skills.
Getting Started with Grays of Westminster
We hope these 10 tips will give fledgling photographers the confidence to begin their creative journey. At Grays of Westminster, we are always on hand to answer any questions and help you get started. Our photography experts can ensure you have everything you need and offer expert guidance. We also have a YouTube channel packed with videos designed to help beginner and professional photographers. No matter the question or guidance you need, rest assured that Grays of Westminster, with decades of experience in photography, can assist you and help you reach your goals.
If you have a query, contact us via phone at 020-7828 4925, or visit our wonderful little shop in the heart of London. You can also order online from our website. Click here to browse. We have the equipment, expertise and enthusiasm to guide you in the right direction. Happy shooting!
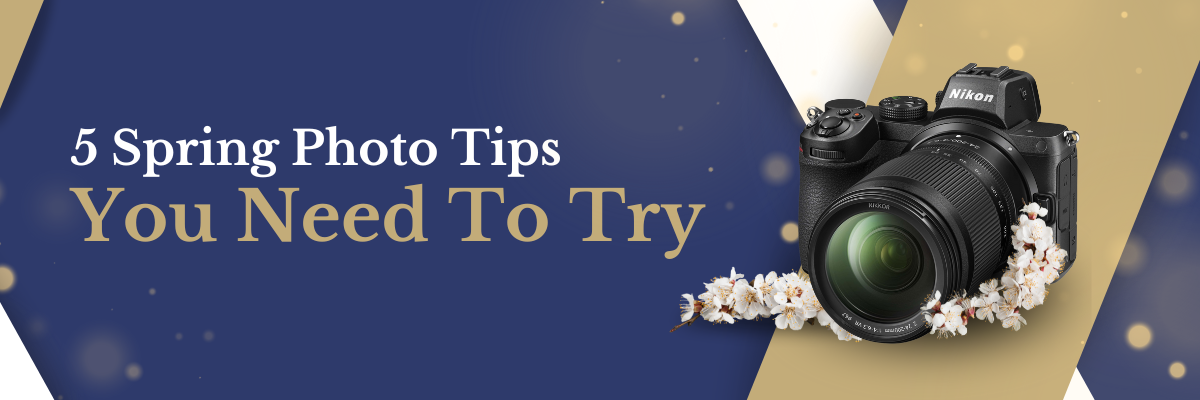
The days are getting longer, the flowers are blooming, and the photography opportunities are appearing around us more than ever. Whether you’re just starting out with your very first Nikon camera or you’re a highly experienced professional, each season brings its own benefits and challenges. With Spring, you are met with dew, bright lighting, newly blossomed flowers and bounds of wildlife that you may not experience amidst the Autumn or Winter months. It’s an amazing time to capture some breathtaking landscapes and wildlife photography.
With that in mind, today, our experts have come together to offer you some must-know tips to elevate your skills and help you capture one of the most vibrant seasons of the year. So, without further ado, let’s jump straight in!
Our Spring Photo Ideas
The Magic of Dew Drop Photography
Dew drops are one the most captivating subjects to shoot in Spring, especially as they almost act as miniature lenses that reflect their beautiful surroundings. As you may know, capturing still or moving water can be tricky, but doing so can really help you develop your skills and lead to some wonderful photography.
To capture these tiny droplets of water that adorn plants and flowers, we recommend:
Reach Your Destination Early: The best time to capture dew drops is early morning. That’s when they’re most fresh and vivid. Reach your destination as early as possible, and you’ll be given the longest time to start shooting.
Stability is Key: We recommend taking a tripod with you on your shoot. Keeping your shots steady will reduce blur and unwanted movement.
Lighting Matters: If you’re lucky enough, you may experience a sunrise on your dew drop shoot. If so, take advantage of a reflector that gently directs the light to make the drops sparkle and helps you avoid unwanted glare towards your camera.
Capturing Reflections with Lens Balls
Have you experimented with lens balls? These nifty little tools are clear glass spheres that add a unique twist to any shot. They can turn your subject upside down for a wow-factor contrast.
Using them is pretty easy, but there’s still some direction you should take:
Size Matters: Choose a size that’s easy to handle yet big enough to capture reflections clearly. A medium-sized ball offers a good balance.
Focus Right: Getting the focus right using a lens ball can be challenging, but the trick is to focus on the image within the ball, not the ball itself. Your Nikon’s manual focus can be a lifesaver here!
Experimenting with Motion Blur
Motion blur should be your best friend this Spring. You’ll be met with leaves rustling, streams flowing, petals falling, and birds flying. Therefore, knowing how to capture motion is a must! Using motion blur, you’ll instantly bring your Spring photos to life.
And you guessed it, we’re going to offer you some advice on how to nail motion blur:
Slow Down Your Shutter: Slowing down the shutter speed lets you capture that captivating blur. But remember, it’s all about balance. Too slow, and everything’s a blur; too fast, and you lose the effect. It depends on how fast the motion is, but if you want to blur a waterfall, for example, a relatively long exposure of 3-5 seconds is best.
Practice Makes Perfect: Experiment with different speeds. There’s no harm in experimenting with your settings to get it just right. But remember, some subjects won’t wait around for you!
Exploring Different Angles for Shrubs and Wildlife
Changing up your perspective when capturing the beauty of Spring will add a new dimension to your photography style. Sometimes, simply trying new angles can create something extraordinary. Here are a few things you can try:
Go Low or Go High: Don’t be afraid to get dirty by lying on the ground or climbing a hill for that unique angle. Where wildlife and plants are involved, you can really be creative in how you choose to showcase them.
Think Outside the Box: Why not try experimenting with your depth of field using secondary subjects? For instance, photographing a deer through a cluster of leaves adds a mysterious, almost fairytale quality to the image.
Mastering Wide Aperture for Detailed Close-Up Shots
Lastly, master your wide aperture in low-light conditions and watch as the perfect bokeh comes to life in your close-ups. Not only will you have a stand-out subject, but you’ll also have a beautifully blurred background that works fantastically as a natural spring photography backdrop. Here’s how our experts achieve the perfect bokeh:
Open Wide: Use a lens that can open to at least f/2.8 or wider. The lower the number, the more pronounced the bokeh. It’s truly amazing how a simple adjustment can turn a busy photo into a serene, focused scene.
Get Close: The closer you are to your subject, the more pronounced the bokeh effect will be.
Spring Photo Shoot Ideas with Grays of Westminster!
Spring is a photographer’s playground, and with the help of Grays of Westminster, you’ll be all set to capture its beauty. Whether you want to upgrade your entire set-up or are on the market for reflectors to help you with lighting issues, we have everything you could need, either online or in our wonderful little shop nestled in London.
Remember, photography is as much about creativity as it is about technique. Don’t be afraid to experiment, and most importantly, have fun this Spring! If you ever have any questions or would like a simple conversation over a shared passion, we love chatting about all things Nikon and photography, and we’re always here to help you find the perfect gear for your next photography adventure. Just email info@graysofwestminster.co.uk!
In the meantime, happy shooting, and may this Spring bring you some of your best shots yet!
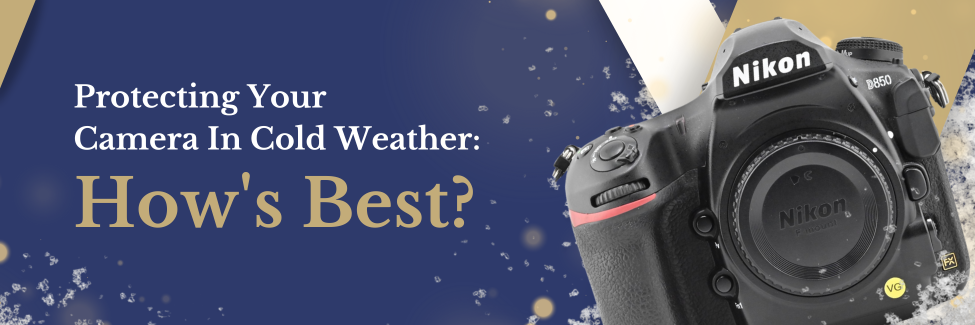
Now that we’re amidst the icy breeze and frosty mornings, photographers are switching up their subjects to reflect the beauty that Winter has to offer. Whether you’re a seasoned professional or just starting out, you must take extra precautions in extreme weather. From wrapping yourself up warmly to keeping your camera hidden between shooting periods, there are some tried and trusted approaches that can help to reduce the risk of damaged equipment and frostbitten toes!
It’s important to understand that the cold can have a significant impact on camera bodies, lenses and batteries, depending on how cold it is. And so, it is imperative that you take protective measures to keep all aspects of your set-up in prime condition.
Today, we will share with you our insights into how we can help you protect your camera and its accessories, ensuring you can continue snapping through to Spring.
What Can You Do To Protect Your Gear
Protecting your camera and accessories from cold weather is essential to maintaining their functionality and longevity. So, without further ado, here are our five practical tips on how to do so:
Use Weather-Sealed Gear
First and foremost, if you’re frequently shooting in cold environments, consider investing in weather-sealed cameras and lenses. Nikon has produced a range of equipment that is specifically designed to withstand harsh conditions, including low temperatures and moisture, which are common in cold weather.
Secondly, while out and about with your camera, your batteries can lose power due to the cold conditions. So, how do you protect your camera battery in cold weather? While it’s all well and good to carry spare batteries close to your body, camera bags add an extra layer to your camera and its internal elements. At Grays of Westminster, we stock a wide range of camera bags from some of the finest brands on the market.
These include Hawkesmill, ThinkTank, Bilingham and Peak Design, which offer a wide selection of camera bags and backpacks, perfect for storing your equipment while you travel from A to B or between shooting periods.
Condensation Prevention
One thing to note when you’re on a shoot is that moving your camera from a cold environment to a warm one can cause condensation to form both inside and outside the camera, potentially damaging the electronics. This can be detrimental to a camera; therefore, you should take extra measures to prevent this by placing your camera in airtight bags inside your chosen camera bag.
We also recommend waiting until your camera is back to room temperature before removing it from the bag again! What temperature is too cold for a camera? We always say from 0°C!
Use a Sturdy Tripod
Can the cold ruin a camera? Yes, but weather conditions such as strong wind can also cause this. Therefore, a sturdy tripod should be your best friend! Tripods offer stability and are a fantastic way to capture hard-to-achieve shots such as wildlife or landscapes. Remember, lightweight tripods might not be sufficient in strong winds or on uneven, icy surfaces!
But do not fret; Grays has several tripod options available in-store and online. From brands such as Peak Design and 3 Legged Thing, you can be sure that your camera and your chosen lens are well-supported and safe.
Protective Gear for Your Equipment
In addition to camera bags, rain covers can offer your camera an extra protective layer. These covers shield your gear not only from the cold but also from snow, rain, and sleet. Consider insulated camera bags that provide additional warmth and protection for extreme conditions. Again, we have variations from ThinkTank!
Camera Accessories from Grays
Not only are we Nikon experts at Grays of Westminster, but we also think outside of the box. When capturing photography during the Winter months, you want to get the most out of your time on location, especially if you’ve travelled there. By following the above, you can minimise delays in getting that perfect shot and even prevent irreversible damage to your camera and its equipment.
To explore our wide range of immaculate Nikon cameras and accessories, you should head over to our website or visit our wonderful little shop in London.
As we say goodbye to the festivities and delve into 2024, the world of photography continues to evolve with remarkable advancements in camera technology. For beginners and professionals alike, choosing the right camera is crucial for achieving the photography goals you’ve set for the year.
At Grays of Westminster, our expert team has a collective background in the vast world of Nikon, and our expertise allows us to advise our customers on the very finest camera equipment available on the market. Today, we are thrilled to present our predicted list of the very best Nikon Z camera releases of 2024. Let’s explore the exceptional models in the Nikon Z family, each chosen for their unique strengths and capabilities!
So, Which Are Our Top Picks?
Nikon Z6 III
First, we have the Nikon Z6 III. Just as the original holds a compact body and a strong build, we expect to see the same for the Mark 3. This adaptive contraption allows for fluidity in shots while offering the perfect speed, resolution, and low-light performance. Think transportable and revolutionary all at the same time. We expect even greater versatility in the new year, with maximum crispness and detail-enhancing abilities.
2. Nikon Z7 III:
Claiming the second spot, we have the Nikon Z7 Mk. 3. The incredibly powerful Z7 II is one of our most popular Nikon cameras. It is well known for capturing even the finest details, allowing every photographer, no matter their subject matter, to thrive. The Nikon 7III is said to deliver even further power when experimenting with lighting. It’ll be a companion for all your creative pursuits, ensuring that every shot is captured with precision and clarity. As with all Z7s, these full-frame mirrorless contraptions bring clarity, high resolution and a beautifully sleek design to the picture.
3. Nikon Z9 II: The Best Professional Nikon Camera
We have a Mark 2 prediction! The formidable Nikon Z9 is a masterpiece in the realm of professional photography – and one that is about to get better. This camera is a powerhouse, offering unparalleled speed compared to any other still camera. As fast as a mechanical shutter with a 1/250 flash sync speed, its resolution and video capabilities make this a showstopping choice for photographers worldwide. Whether it’s fast-paced sports photography or detailed wildlife shots, we expect the new Z9 to continue delivering consistently exceptional results – that may even be more crisp!
4. Nikon Z50 II: The Best Beginner Nikon Camera
Is the Nikon Z50 worth investing in this year? Yes! Fourth on our list is the Nikon Z50, and we hope to see the Mark 2 make an appearance in 2024. This camera collection is one of our most recommended choices for beginners. They strike the perfect balance between ease of use and professional-grade features. With a compact design making it incredibly user-friendly, combined with its impressive 20.9 MP DX-format sensor, new photographers can capture stunning images just as they can with a Nikon mirrorless. The Z50 II will be a new gateway to the world of photography, offering a solid foundation for those starting their journey.
5. Nikon Z FC II: The Best Retro Nikon Camera
Lastly, we have the Nikon Z FC Mark 2, a long-awaited upgrade on the Nikon Z FC, which has always been a true credit to classic photography. This camera series combines vintage design with modern technology, making it a fantastic choice for those who appreciate the aesthetics of old-school photography but the innovation that even old Nikon cameras boast. The Z FC boasts superb image quality, whether stills or movies, and we’re hoping for even more scope on this with its next variation. Don’t worry; you’ll be able to tap into your creative mindset with this mirrorless camera, which is already both lightweight and stunning.
What Should We Expect From Nikon in 2024?
In 2024, Nikon is expected to continue its legacy of innovation and quality in the photography world. Building on its renowned expertise, Nikon is likely to push the boundaries further in digital imaging technology, offering a range of cameras that cater to various levels of photographers, from beginners to professionals.
We can anticipate advancements in sensor technology, delivering even higher-resolution images with exceptional detail and dynamic range. Nikon’s focus on mirrorless technology is expected to intensify, with new models showcasing improved autofocus, faster processing speeds, and enhanced video capabilities, meeting the growing demand for high-quality multimedia content.
Moreover, Nikon might integrate more advanced connectivity options, like 5G or advanced wireless technologies, for seamless image transfer and remote operation. With a commitment to sustainability, Nikon’s future products may also emphasise eco-friendly designs and materials. Overall, 2024 promises to be an exciting year for Nikon enthusiasts, with groundbreaking cameras that blend artistic expression with cutting-edge technology.
Visit Us Today
We adore each of the Nikon cameras we’ve listed above, and they all offer something unique, catering to the varied needs of photographers. Whether you’re just starting or are a seasoned professional, Grays of Westminster is here to help you find the perfect camera to meet all your photography goals in 2024. Visit us in our treasure trove shop, which is found in the heart of London, for all trending Nikon cameras, or explore our collection online, and let’s make this year your most photographically productive yet.